Ever run inference and think: “These bounding boxes look pretty basic”?
You’re not alone. Default overlays get the job done, but they rarely look great or fit your specific needs. Maybe you need bigger fonts for a presentation. Maybe you want custom colors that match your brand. Or maybe you’re building something that needs privacy protection with blur effects.
The good news? DeGirum PySDK makes overlay customization surprisingly straightforward. You can control everything from font sizes to transparency levels to selective blurring, all with simple parameters when you load your model.
No complex post-processing. No separate rendering pipelines. Just clean, customizable overlays that work exactly how you want them to.
Setting up your environment
This guide assumes that you have installed PySDK, the hardware runtime and driver, and DeGirum Tools.
To install degirum_tools, run
pip install degirum_toolsin the same environment as PySDK.
Basic model setup and inference
Let’s start with the basics. Here’s how you typically load a model and run inference:
import degirum as dg
import degirum_tools
from degirum_tools import remote_assets


# Define variables
model_name = "yolov8n_coco--640x640_quant_axelera_metis_1"
zoo_url = 'degirum/axelera'
inference_host_address = '@local'
device_type = 'AXELERA/METIS'
token = ''
image_source = remote_assets.cat

# Load the model with default overlay settings
model = dg.load_model(
    model_name=model_name,
    inference_host_address=inference_host_address,
    zoo_url=zoo_url,
    token=token,
    device_type=device_type
)

# Perform inference
print(f"Running inference using '{model_name}' on image source '{image_source}'")
inference_result = model(image_source)

print('\nInference Results\n', inference_result)

# Display results
with degirum_tools.Display("AI Camera") as output_display:
    output_display.show_image(inference_result)
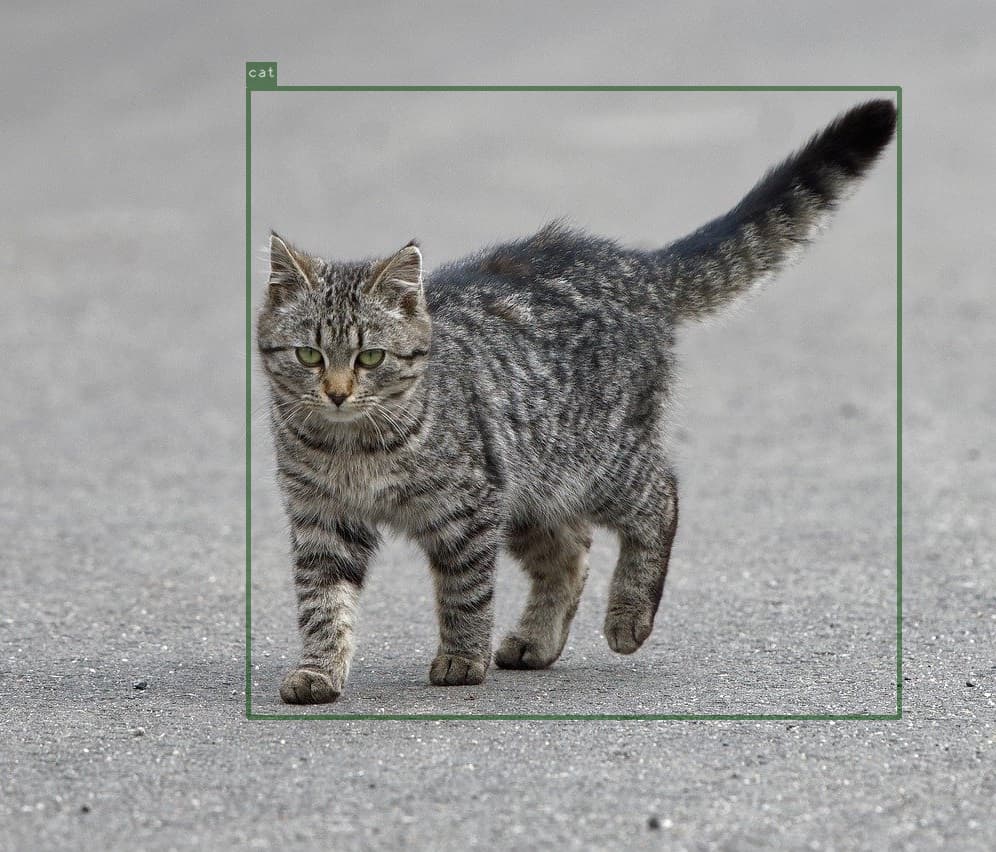
This gives you the standard overlay: black bounding boxes, visible class labels, no confidence scores, and no special effects. It works, but it’s pretty vanilla.
The magic happens when you start adding overlay parameters to your dg.load_model() call. That’s where you can really make things look professional.
Controlling label display
Sometimes you want clean visuals without text clutter. Maybe you’re building a demo where the object types are obvious, or you just want minimalist overlays.
Enter overlay_show_labels:
# Load model with labels hidden
model = dg.load_model(
    model_name=model_name,
    inference_host_address=inference_host_address,
    zoo_url=zoo_url,
    token=token,
    device_type=device_type,
    overlay_show_labels=False  # Hide class labels
)

# Run inference
inference_result = model(image_source)

# Display results
with degirum_tools.Display("AI Camera") as output_display:
    output_display.show_image(inference_result)
Now you get just the bounding boxes - no “person”, “dog”, or other class names cluttering up your image. Clean and simple.
.
The default is True (labels visible), so you only need to set this when you want them gone.

Managing confidence scores
Here’s where things get interesting for debugging or building trust with your users. Ever wonder how confident your model actually is about each detection?
# Load model with confidence scores enabled
model = dg.load_model(
    model_name=model_name,
    inference_host_address=inference_host_address,
    zoo_url=zoo_url,
    token=token,
    device_type=device_type,
    overlay_show_probabilities=True  # Show confidence scores
)

# Run inference
inference_result = model(image_source)

# Display results
with degirum_tools.Display("AI Camera") as output_display:
    output_display.show_image(inference_result)
Now instead of just “person”, you’ll see “person 0.95” or “dog 0.87”. These numbers tell you how sure the model is about each detection. Super useful for debugging edge cases or explaining AI reliability to stakeholders.

Default is False because most people don’t want the extra text noise, but it’s incredibly handy when you need it.
Adjusting visual properties
Making text readable
Ever squint at tiny labels on a high-res image? Yeah, we’ve all been there. overlay_font_scale to the rescue:
# Load model with larger font size
model = dg.load_model(
    model_name=model_name,
    inference_host_address=inference_host_address,
    zoo_url=zoo_url,
    token=token,
    device_type=device_type,
    overlay_font_scale=3.2  # Much bigger text
)

# Run inference and display
inference_result = model(image_source)
with degirum_tools.Display("AI Camera") as output_display:
    output_display.show_image(inference_result)

The default scale is 1.0. Want bigger text for presentations? Try 2.0-4.0. Need smaller text for thumbnails? Go with 0.5-0.8. It’s that simple.
Beefing up those boxes
Thin bounding boxes can be hard to see, especially in busy images. overlay_line_width lets you make them more prominent:
# Load model with thicker bounding boxes
model = dg.load_model(
    model_name=model_name,
    inference_host_address=inference_host_address,
    zoo_url=zoo_url,
    token=token,
    device_type=device_type,
    overlay_line_width=5  # Thick, visible boxes
)

# Run inference and display
inference_result = model(image_source)
with degirum_tools.Display("AI Camera") as output_display:
    output_display.show_image(inference_result)
Default is 3.0, which works fine for most cases. But when you need those boxes to really pop, maybe for a demo or presentation, bump it up to 5 or even higher.
Adding some color
Black boxes are boring. Let’s fix that:
# Load model with custom color palette
model = dg.load_model(
    model_name=model_name,
    inference_host_address=inference_host_address,
    zoo_url=zoo_url,
    token=token,
    device_type=device_type,
    overlay_color=[(255, 0, 0), (0, 255, 0), (0, 0, 255)]  # Red, green, blue
)

# Run inference and display
inference_result = model(image_source)
with degirum_tools.Display("AI Camera") as output_display:
    output_display.show_image(inference_result)

The system automatically assigns colors to different object classes using the formula overlay_color[class_id % len(overlay_color)]. So if you have 3 colors and 5 classes, it cycles through them.
RGB values go from 0 to 255. Want bright red? Use (255, 0, 0). Want that orange-ish color? Try (255, 165, 0). Play around, it’s fun.
Dialing down the intensity
Sometimes overlays can be too “in your face.” overlay_alpha lets you make them more subtle:
# Load model with semi-transparent overlays
model = dg.load_model(
    model_name=model_name,
    inference_host_address=inference_host_address,
    zoo_url=zoo_url,
    token=token,
    device_type=device_type,
    overlay_alpha=0.5  # 50% see-through
)

# Run inference and display
inference_result = model(image_source)
with degirum_tools.Display("AI Camera") as output_display:
    output_display.show_image(inference_result)
Values range from 0 (almost invisible) to 1 (fully solid). Around 0.5-0.7 often works well, you can see the detections clearly but they don’t completely dominate the image.
Applying blur effects
Now here’s where things get really practical. Need to protect privacy? Want to anonymize faces or license plates? Blur effects have your back:
# Load model with blur effect on specific object class
model = dg.load_model(
    model_name=model_name,
    inference_host_address=inference_host_address,
    zoo_url=zoo_url,
    token=token,
    device_type=device_type,
    overlay_blur="person"  # Only blur detected dogs
)

# Run inference and display
inference_result = model(image_source)
with degirum_tools.Display("AI Camera") as output_display:
    output_display.show_image(inference_result)
You’ve got options here:
-
Single class:
overlay_blur="person"- blurs only people -
Multiple classes:
overlay_blur=["person", "face"]- blurs people and faces -
Everything:
overlay_blur="all"- blurs every detection -
Nothing:
overlay_blur=None(default) - no blur

This is perfect for building privacy-compliant systems or creating anonymized datasets while keeping the overall context intact.
Complete customization example
Let’s put it all together and create something that really stands out:
import degirum as dg
import degirum_tools
from degirum_tools import remote_assets


# Configuration variables
model_name = "yolov8n_coco--640x640_quant_axelera_metis_1"
zoo_url = 'degirum/axelera'
inference_host_address = '@local'
device_type = 'AXELERA/METIS'
token = ''
image_source = remote_assets.cat

# Load model with full customization
model = dg.load_model(
    model_name=model_name,
    inference_host_address=inference_host_address,
    zoo_url=zoo_url,
    token=token,
    device_type=device_type,
    overlay_show_labels=True,                    # Show what we found
    overlay_show_probabilities=True,             # Show how confident we are
    overlay_font_scale=2.0,                      # Make text actually readable
    overlay_line_width=4,                        # Bold boxes that pop
    overlay_color=[(255, 165, 0), (0, 255, 255), (255, 20, 147)],  # Fun colors
    overlay_alpha=0.7,                           # Slightly see-through
    overlay_blur="person"                        # Keep people's privacy
)

# Perform inference
print(f"Running inference using '{model_name}' on image source '{image_source}'")
inference_result = model(image_source)

print('\nInference Results\n', inference_result)

# Display the final result
with degirum_tools.Display("AI Camera") as output_display:
    output_display.show_image(inference_result)
This setup gives you professional-looking overlays with readable text, distinctive colors, and privacy protection all in one go. Much better than the default black boxes!
Best practices and recommendations
Keep performance in mind: The overlay rendering happens after inference, so it doesn’t slow down your model. But blur effects do add some processing time; the more objects you blur, the longer it takes. For real-time applications, be strategic about what you blur.
Color choices matter: Bright colors (RGB values above 200 on at least one channel) show up better against most backgrounds. Avoid colors that might blend in with common objects in your domain. When in doubt, stick with high-contrast combinations.
Font scaling rules of thumb:
-
Presentations or big screens: 2.0-4.0
-
Regular computer monitors: 1.0-2.0
-
Mobile or embedded displays: 0.7-1.5
Transparency sweet spots: Values between 0.6-0.8 usually work best. Too low (under 0.3) and your overlays become hard to see. Too high (over 0.9) and you lose important image details.
Privacy considerations: When blurring for privacy, “person” and “face” are your go-to classes. The blur happens at the pixel level within each bounding box, so it’s effective protection without destroying the overall image context.
Mix and match: Don’t be afraid to experiment with different combinations. What works great for security footage might look terrible in a product demo. The beauty of these parameters is how easy it is to adjust them until you get exactly what you need.
The overlay system strikes a nice balance, simple enough to configure in seconds, flexible enough to handle pretty much any visual requirement you throw at it.